
If you are looking to decorate a nursery, kids’ room, bedroom or even a living room, chances are you might be looking to make some DIY letter wall art. A large monogram letter is a fabulous way to make a statement on a blank wall while personalizing your space. It can be quite pricey to buy a large letter, so making one yourself is a great option. Since cane webbing is such an up and coming material right now, I thought it would be perfect to make a large letter using cane webbing for my son’s big boy bedroom. This DIY letter wall art tutorial is so easy and the end result is unique and modern!
How to make DIY letter wall art? First, map out your letter on cane webbing with tape. Then, cut your trim pieces. Next, trim around the cane and lay it on top of the trim. Staple the cane webbing onto the trim. Lastly, trim off any excess cane webbing and hang your diy letter wall art.
*this post contains affiliate links

DIY Letter Wall Art Using Cane Webbing
I am no stranger to hanging a large letter in a kid’s room. My confetti letter was one of my most popular posts on Pinterest and it lived in my daughter’s room until we moved to our most recent home. I wanted to do a less girly version for my son’s room and I absolutely love it against the black wall.
This was my first time working with cane webbing and I found that although it was a little tricky to track down, it was easy to work with. I compiled a list of where to buy cane webbing so that it’s easier for you to find than it was for me. This tutorial would work for most letters or shapes, although rounded letters might be a little tricker.
The nice thing about this tutorial is that you can make your letter any size you need to fit your space. If you have a large wall with high ceilings, then make your letter huge to fill the space and make a big statement! If you just need to fill a small space, make a letter that is just a foot tall. Either way, the method is the same. You can leave your letter raw wood like I did or paint it a fun color.
Materials Needed For DIY Letter Wall Art
Here’s what you will need:
- Cane Webbing
- 1.5″ Flat Wood Trim
- Staple Gun
- Painter’s Tape
- Staples
- Scissors
- Utility Knife
- Table Saw
- Tape Measure
Instructions for How To Make DIY Letter Wall Art

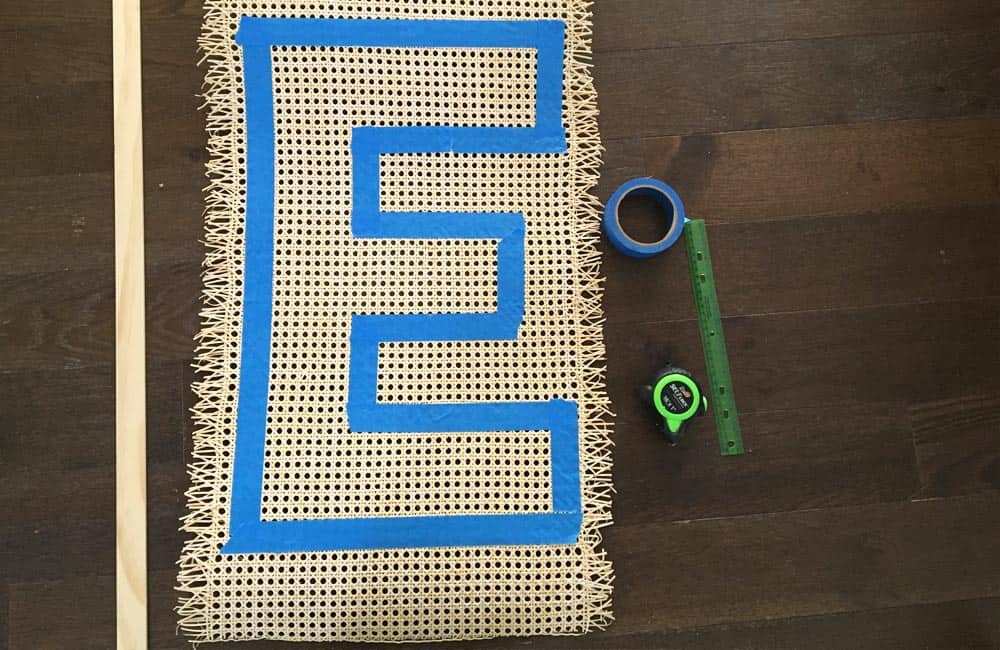
1. First, you will want to map out your letter on the cane webbing using painter’s tape.
Since we were doing a fairly symmetrical letter, we wanted each space to be even. We made the spaces between each part of the letter 4″ in width and used the lines in the cane as a rough guideline to keep everything straight.

Use your tape measure to make sure everything is even and symmetrical.
2. Next, cut all of your trim pieces, using the tape as a guide.

You could do mitre cuts, but we chose to just make straight cuts for ease. Cutting them one at a time and laying the cut pieces on the taped outline really helped to keep track of all the pieces.
3. Trim around the outside of the taped letter, leaving about an inch.
Leaving an extra inch of space will give you some room to make adjustments when you are stapling.
4. Tape the trim pieces at the joints, using painter’s tape.
This will make it easier to staple later since it’s difficult to see all of the joints through the cane webbing.

5. Carefully flip the trim over and lay the cut cane webbing on top.

6. Staple the webbing onto the trim, stretching the cane as you go.
Add extra staples at each seam or joint.

7. Trim off any extra cane webbing using a utility knife or scissors.

8. Add a picture hanger on the back, if desired.

I actually ended up hanging mine with clear thumbtacks.

I think it looks so good with the wall to wall shelf above it!

Such a great addition to this room. I love that we were able to bring in some texture with the cane webbing while filling the blank space on the wall and personalizing it with the monogram letter!
