
If you are trying to teach kids about healthy money habits, then you probably need a piggy bank. We will show you how to make an easy DIY piggy bank that your kids will love using!
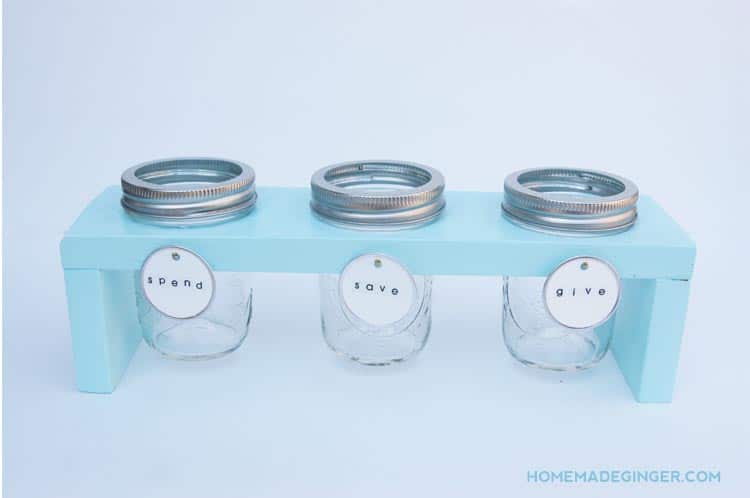
This DIY piggy bank is easy to make even if you don’t have much DIY experience. We will show you how to create a wooden stand for 3 mason jars. You will end up with a piggy bank for kids that has a way for them to divide their money up into “spend”, “save” and “give” categories!
We have been trying to teach our girls about money habits and practicing generosity lately. They get a very small weekly allowance for doing chores, but it was difficult to keep the money organized when teaching about saving, spending and giving. After a little brainstorming, my husband came up with a DIY piggy bank that solves the problem! I think these little wooden stands that small mason jars slip into are just the perfect solution to visually see how to divide kids’ money up into the 3 categories.

How To Make An Easy Piggy Bank
We have been trying to teach our girls about money habits and practicing generosity lately. They get a very small weekly allowance for doing chores, but it was difficult to keep the money organized when teaching about saving, spending and giving. After a little brainstorming, my husband came up with a DIY piggy bank that solves the problem! I think these little wooden stands that small mason jars slip into are just the perfect solution to visually see how to divide kids’ money up into the 3 categories.
The girls love their new piggy banks and thinking about how much to save and give with each allowance. I love that they now have a little stash of coins that they can take to church that is only theirs to give!

Materials Needed For A DIY Piggy Bank
Materials
- 3.5 inch X 20 inch X 3/4 inch board (approximately)
- 2.5 inch Hole Saw
- Small Nails
- Sand Paper
- Spray Paint
- Sanding Dremel Bit
Instructions For Making A DIY Piggy Bank
Step One:Cut the board to about 12.5 inches for the top piece. The legs need to be at least 2 3/4 inches each.
Step Two: Measure to the center of the top board to cut the first hole. Use the hole saw to cut the first hole in the center. Measure 2 1/4 inches from each edge to mark the center of the outside holes and cut.

Step Three: Use the dremel sanding bit to sand inside of the cut holes. Do this until the mason jars fit. Be sure to sand evenly around the holes.

Step Four: Nail legs to the top board piece. You could also glue and clamp the pieces together.

Step Five: Sand all surfaces with a fine grit sand paper.
Step Five: Spray paint with the color of your choice.

Step Six: For the labels, use alphabet stickers on small round tags. Use small, short picture hanging nails for the labels to hang on.
Step Seven: Insert the mason jars and start saving!
Enjoy your little DIY piggy bank! I kind of want one for myself.
If you want some more kid friendly tutorials, check out these posts!
- Kid’s Drawing Furniture Update
- Watercolor Plant Markers
- Dollar Store DIY Night Light
- Toothpick Cacti
- Q-Tip Flowers
