
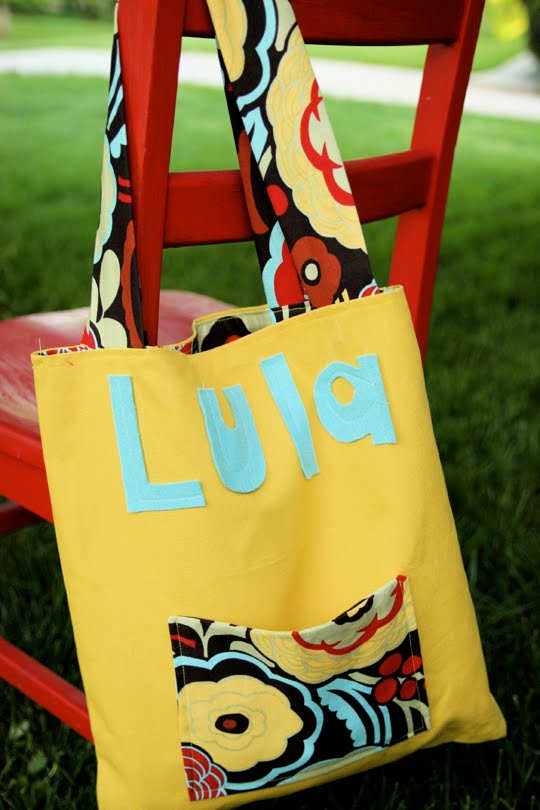
Lula needed a bag that was just hers to take to the nursery at church. I was always switching bags and never had them labeled with her name. The kind nursery workers were always asking me if her bag was labeled, and of course it never was. Anyway, I decided to make a super simple bag with her name permanently on it. It can also be a little library bag. The pocket in front is perfect for stashing a little library card. It really is so simple, I just came up with the pattern to fit our needs. Here is the tutorial:

Here’s what you’ll need to make one bag:
FABRIC:
1/2 yard canvas-type fabric for bag
1/2 yard cotton fabric for lining, handles and pocket
1 8in. X 12in. piece of felt
Thread
Pins
Sewing Machine
Scissors or Rotary Cutter
1. From the Fabric, Cut the Following:
2 14in. X 16in. pieces of canvas fabric (for bag)
2 14in. X 16in. pieces of cotton fabric (for lining)
1 8in X 12in. piece of cotton fabric (for pocket)
2 5in. X 22in. pieces of cotton fabric (for handles)

2. Make The Felt Letters: Draw out your child’s name on a piece of paper in block style. Use this as a pattern to cut your child’s name out of the felt. Make the letters about 2 inches tall. Pin the name towards the top of one of the pieces of canvas. Sew the letters onto the canvas, using a coordinating thread. Since felt does not unravel, you can just sew one seam down the middle of each letter to make it super simple!

3. Make the Pocket: Fold the 8 X 12 piece of cotton in half, right sides together, and pin. Sew all sides (except for the folded edge), leaving a space about 2 inches open on one edge. Turn pocket right side out and pin directly onto the front of the bag under the felt name. Sew around the pocket, about 1/8 inch from the edge. In doing this, you will be attaching it to the bag as well as sewing the 2 inch opening closed.

4 Sew the Outside of the Bag: Pin right sides of both pieces of canvas together. Do the same with the pieces of lining. Stitch around 3 sides of the canvas, leaving the top open, turn right side out.
5. Sew the Lining: Stitch around 3 sides of the lining, leaving the top open. In the same manner as the pocket, leave an opening at the bottom of the lining a few inches wide.

6. Attach the Straps: Fold the cotton strap fabric in half lengthwise, right sides together and pin. Sew along edge. Turn straps right side out and pin one to the front, and one to the back of the top of the canvas. The straps should form a “u” when hanging down on the canvas.


7. Assemble Bag: With straps pinned to the canvas bag, place it inside the lining, right sides together and stitch along top edge. Pull canvas through opening in lining, then stitch opening closed.

8. Add the Finishing Touches: Put lining down inside of the bag, and press with a hot iron. Then, top stitch 1/8 inch around top of the bag to secure all the layers. You are finished!

